आज अगर आपका बिजनेस ऑनलाइन नहीं है, तो आप बहुत बड़े मौके गंवा रहे हैं। WordPress Blog Website बनाना आपके बिजनेस को अगले लेवल पर ले जाने का सबसे आसान और सस्ता तरीका है। चाहे आप मुंबई में कपड़ों की दुकान चलाते हों या पुणे में कोचिंग क्लास, एक WordPress Blog Website आपको लाखों ग्राहकों तक पहुंचने में मदद करती है।
WordPress Blog Website से आपका बिजनेस Google पर रैंक करता है, ग्राहक आपको आसानी से ढूंढ पाते हैं और आपकी विश्वसनीयता बढ़ती है। छोटे दुकानदार से लेकर बड़ी कंपनियां – सभी WordPress का इस्तेमाल कर रहे हैं। इस गाइड में हम स्टेप बाय स्टेप सीखेंगे कि कैसे आप अपनी खुद की WordPress Blog Website बना सकते हैं, उसे प्रोफेशनल लुक दे सकते हैं, Google पर रैंक करा सकते हैं और उससे पैसे भी कमा सकते हैं। तो चलिए शुरू करते हैं!

- 1. WordPress Blog Website Kya Hai?
- 2. WordPress Blog Banane Se Pehle Ki Taiyari
- 3. WordPress Blog Website Setup
- 4. WordPress Blog Website Ko Customize Karna
- 5. Pehla Blog Post Kaise Likhein
- 6. WordPress Blog Website Ko Professional Banaye
- 7. WordPress Blog Website Ki Security Aur Performance
- 8. WordPress Blog Ko Google Par Rank Kaise Karaye
- 9. Blog Website Se Paise Kaise Kamaye
- Conclusion
- Frequently Asked Questions
- Start Your WordPress Blog Website with Ameazia
1. WordPress Blog Website Kya Hai?
1.1 WordPress.com vs WordPress.org
WordPress Blog Website बनाने से पहले यह समझना जरूरी है कि WordPress के दो वर्जन हैं। यह बिल्कुल वैसे ही है जैसे WhatsApp और WhatsApp Business – दोनों WhatsApp हैं लेकिन काम अलग-अलग करते हैं।
WordPress.com एक फ्री प्लेटफॉर्म है जहां आप बिना पैसे दिए ब्लॉग बना सकते हैं। लेकिन इसमें काफी लिमिटेशन हैं। आपका डोमेन नेम “yourblog.wordpress.com” जैसा दिखेगा, जो प्रोफेशनल नहीं लगता। आप अपनी मर्जी से थीम या प्लगइन नहीं लगा सकते और न ही इससे पैसे कमा सकते हैं। यह उन लोगों के लिए है जो सिर्फ personal diary या hobby के लिए ब्लॉग चलाना चाहते हैं।
दूसरी तरफ WordPress.org एक self-hosted प्लेटफॉर्म है। इसका मतलब है आपको अपनी होस्टिंग और डोमेन खरीदना पड़ता है, लेकिन आपको पूरी आजादी मिलती है। आप अपनी WordPress Blog Website को जैसे चाहें customize कर सकते हैं, कोई भी प्लगइन या थीम इस्तेमाल कर सकते हैं और पैसे भी कमा सकते हैं। इंडियन बिजनेस के लिए WordPress.org ही बेस्ट ऑप्शन है।
कॉस्ट की बात करें तो WordPress.org का सॉफ्टवेयर फ्री है, लेकिन आपको होस्टिंग के लिए सालाना ₹2,000 से ₹5,000 और डोमेन के लिए ₹500 से ₹1,000 खर्च करने पड़ते हैं। यह निवेश आपके बिजनेस के लिए बहुत फायदेमंद साबित होता है।
1.2 WordPress Blog Ke Fayde
WordPress Blog Website बनाने के फायदे गिनाए नहीं जा सकते। सबसे पहला फायदा है SEO और Google Ranking. जब आप अपनी WordPress Blog Website पर अच्छे आर्टिकल लिखते हैं, तो Google आपको ऊपर दिखाता है। मान लीजिए आप दिल्ली में CA हैं और “GST filing Delhi” पर रैंक करते हैं, तो हजारों लोग आपको ढूंढ सकते हैं।
दूसरा बड़ा फायदा है Customer Engagement. आपकी WordPress Blog Website आपके ग्राहकों से सीधा connection बनाती है। वे आपके ब्लॉग पढ़ते हैं, कमेंट करते हैं और आपको trust करने लगते हैं। यह trust ही बिजनेस बढ़ाने की चाबी है।
Cost-effective Marketing का तो कोई जवाब नहीं। TV या अखबार में ad देने में लाखों रुपये लगते हैं, लेकिन WordPress Blog Website से आप फ्री में अपने प्रोडक्ट या सर्विस के बारे में बता सकते हैं। एक बार अच्छा content लिखा, तो वह सालों साल काम करता है।
Lead Generation भी बहुत आसान हो जाता है। आप अपनी WordPress Blog Website पर contact form लगा सकते हैं, email signup के लिए कह सकते हैं और WhatsApp integration कर सकते हैं। मुंबई की एक कपड़े की दुकान ने WordPress Blog Website बनाई और 6 महीने में उनके online orders 300% बढ़ गए।
सबसे important बात – Brand Building. जब लोग आपकी WordPress Blog Website पर valuable information पढ़ते हैं, तो आप उनकी नज़र में expert बन जाते हैं। लोग उसी से खरीदते हैं जिस पर trust करते हैं।
2. WordPress Blog Banane Se Pehle Ki Taiyari
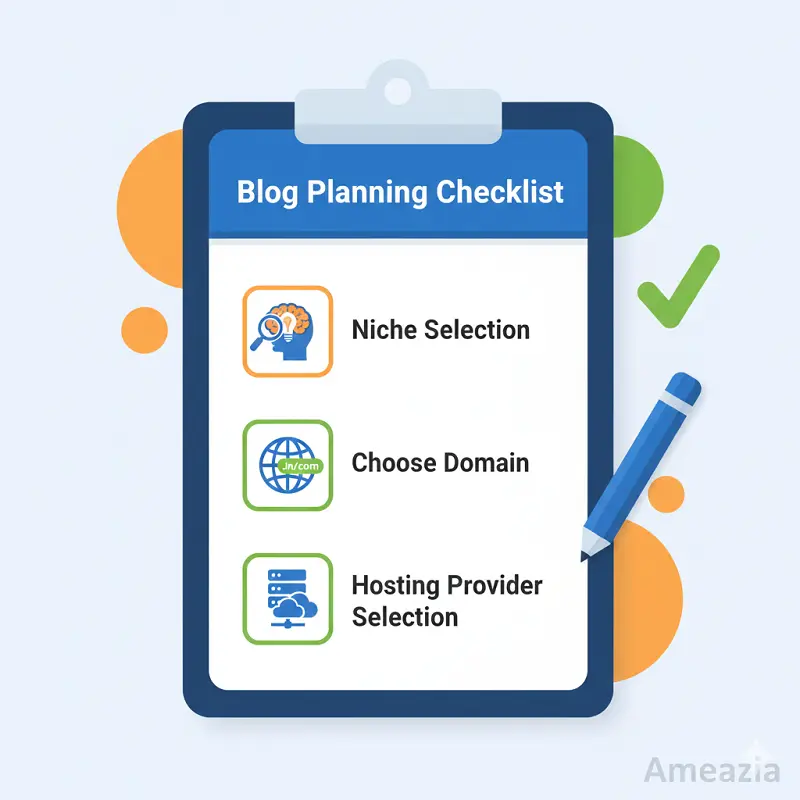
2.1 Niche Selection: Blog Topic Kaise Choose Karein
अपनी WordPress Blog Website के लिए सही niche चुनना बिल्कुल वैसा है जैसे दुकान खोलने से पहले यह तय करना कि आप क्या बेचेंगे। अगर आप जयपुर में हैं तो handicrafts का ब्लॉग शुरू कर सकते हैं या अगर fitness में interest है तो yoga और health पर लिख सकते हैं।
Indian Market Research के लिए सबसे पहले अपने आस-पास देखिए। लोग किस चीज़ की तलाश कर रहे हैं? Google Trends India पर जाकर देखें कि कौन से topics trending हैं। उदाहरण के लिए – “online business ideas”, “digital marketing”, “cooking recipes in Hindi” जैसे topics बहुत popular हैं।
Profitable Niches की बात करें तो Indian market में कुछ topics हमेशा काम करते हैं – Education (competitive exams, online courses), Finance (mutual funds, tax saving), Technology (mobile reviews, apps), Health (Ayurveda, yoga) और Food (Indian recipes, street food)। अपनी WordPress Blog Website के लिए ऐसा topic चुनें जिसमें आपको knowledge भी हो और interest भी।
Competition Analysis के लिए Google पर अपना topic search करें। देखें कि कौन-कौन से ब्लॉग पहले page पर आ रहे हैं। उनकी WordPress Blog Website कैसी है, वे क्या लिख रहे हैं और आप उनसे बेहतर क्या कर सकते हैं। Tools जैसे Ubersuggest या AnswerThePublic इस्तेमाल करें।
याद रखें – सबसे important है passion और patience। अपनी WordPress Blog Website को grow करने में समय लगता है, इसलिए ऐसा topic चुनें जिसके बारे में आप लंबे समय तक लिख सकें।
2.2 Domain Name Kaise Choose Karein
Domain name आपकी WordPress Blog Website का पता है – जैसे आपकी दुकान का address होता है। यह छोटा याद रखने में आसान और आपके business से related होना चाहिए।
.in vs .com की debate बहुत पुरानी है। अगर आपका बिजनेस सिर्फ India में है, तो .in domain perfect है। यह सस्ता भी होता है (₹500-700 सालाना) और Indian audience को भरोसा भी ज्यादा आता है। लेकिन अगर आप globally काम करना चाहते हैं, तो .com ज्यादा professional लगता है। Best option है – दोनों खरीद लें और एक को दूसरे पर redirect कर दें।
Brand-friendly Domain चुनने के लिए कुछ tips हैं। पहला – नाम छोटा रखें (10-15 characters से ज्यादा नहीं)। दूसरा – spelling simple रखें ताकि लोग आसानी से टाइप कर सकें। तीसरा – numbers और hyphens से बचें। “bestshoes.in” बेहतर है “best-shoes-123.in” से।
Domain Registration के लिए Indian providers जैसे BigRock, GoDaddy India, Hostinger India या Namecheap का इस्तेमाल करें। ये सभी UPI, credit card और net banking accept करते हैं। Domain खरीदते समय privacy protection जरूर लें ताकि आपकी personal details public न हों।
Cost और Renewal की बात करें तो .in domain ₹500-1000 में मिल जाता है पहले साल के लिए, लेकिन renewal में थोड़ा ज्यादा हो सकता है। इसलिए 2-3 साल के लिए advance में खरीद लें, ज्यादा सस्ता पड़ता है। आपकी WordPress Blog Website के लिए domain एक permanent investment है।
2.3 Web Hosting Provider Selection
Hosting वह जगह है जहां आपकी WordPress Blog Website रहती है – बिल्कुल वैसे जैसे आपके घर का plot. सही hosting चुनना बहुत जरूरी है क्योंकि इससे आपकी website की speed और security depend करती है।
Best Indian Web Hosting Companies में Hostinger India सबसे popular है (₹149/month से शुरू), Bluehost India भी अच्छा option है (₹199/month से), A2 Hosting India fast speed देता है और BigRock बड़ी company है। सभी Indian payment methods support करते हैं।
Shared Hosting vs VPS Hosting को समझना जरूरी है। Shared hosting में एक server पर कई websites होती हैं – जैसे PG में अलग-अलग rooms। यह सस्ता होता है (₹100-500/month) और शुरुआत के लिए perfect है। VPS hosting में आपको dedicated resources मिलते हैं – जैसे अपना खुद का flat. यह महंगा है (₹1000-3000/month) लेकिन fast और secure है। नई WordPress Blog Website के लिए shared hosting से शुरू करें।
Hosting Plans comparison करते समय देखें – कितनी storage मिल रही है (minimum 10GB चाहिए), bandwidth unlimited है या नहीं, free SSL certificate मिल रहा है या नहीं और customer support Hindi में available है या नहीं।
Server Location बहुत important है। अगर आपके ज्यादातर visitors India से हैं, तो Indian servers (Mumbai, Delhi में) चुनें। इससे आपकी WordPress Blog Website fast load होगी। Foreign servers (US, UK) से India में load होने में ज्यादा समय लगता है, जो SEO के लिए अच्छा नहीं है।
3. WordPress Blog Website Setup
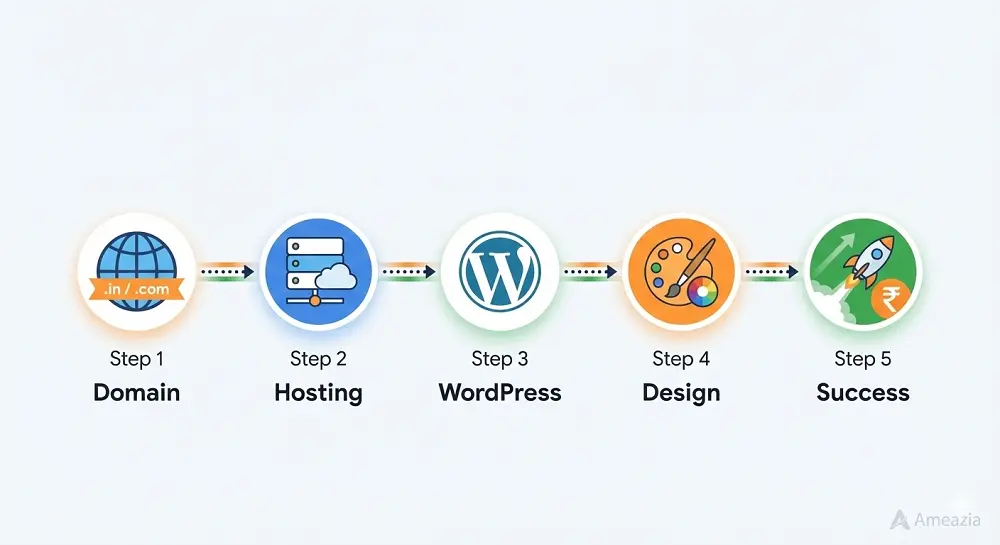
3.1 Domain Aur Hosting Purchase Karein
अब असली काम शुरू होता है – अपनी WordPress Blog Website के लिए domain और hosting खरीदना। यह process बिल्कुल online shopping जैसा है, बस थोड़ा ध्यान से करना है।
सबसे पहले किसी अच्छे hosting provider की website पर जाएं – मान लीजिए Hostinger India. वहां “Web Hosting” section में जाएं और अपने budget के हिसाब से plan चुनें। शुरुआत में “Single Web Hosting” plan काफी है जो ₹149-199/month में मिल जाता है। 12 months का plan लें तो सस्ता पड़ता है।
Plan select करने के बाद domain name डालना है। जो domain name आपने सोचा था, वह type करें और check करें कि available है या नहीं। Available है तो “Add to Cart” पर क्लिक करें। कुछ hosting companies first year free domain भी देती हैं – यह offer मिले तो ले लें।
3.2 WordPress Installation Karein
WordPress Blog Website install करना बहुत आसान है – इससे भी आसान है Facebook account बनाना। दो तरीके हैं – one-click installation और manual installation.
One-click Installation सबसे आसान है। अपने hosting account के cPanel में login करें। नीचे scroll करें और “WordPress” या “Softaculous” icon ढूंढें। उस पर click करें, फिर “Install Now” button मिलेगा। अब कुछ basic details भरनी हैं – choose protocol (https:// select करें), domain select करें, site name और description डालें, admin username और strong password बनाएं और admin email डालें। “Install” button दबाएं और 2-3 मिनट में आपकी WordPress Blog Website तैयार!
Manual Installation थोड़ा technical है लेकिन ज्यादा control देता है। WordPress.org से latest version download करें, FTP client (जैसे FileZilla) से hosting पर upload करें, MySQL database बनाएं और wp-config.php file में database details डालें। यह method तभी use करें जब automatic installation काम न करे।
Installation complete होने के बाद आपको दो important links मिलेंगे – yoursite.com (यह आपकी WordPress Blog Website है) और yoursite.com/wp-admin (यहां से आप website manage करेंगे)। Congratulations – आपकी WordPress Blog Website अब live है!
3.3 WordPress Dashboard
WordPress Dashboard आपकी WordPress Blog Website का control room है – जैसे आपकी दुकान का back office. यहीं से आप सब कुछ manage करते हैं।
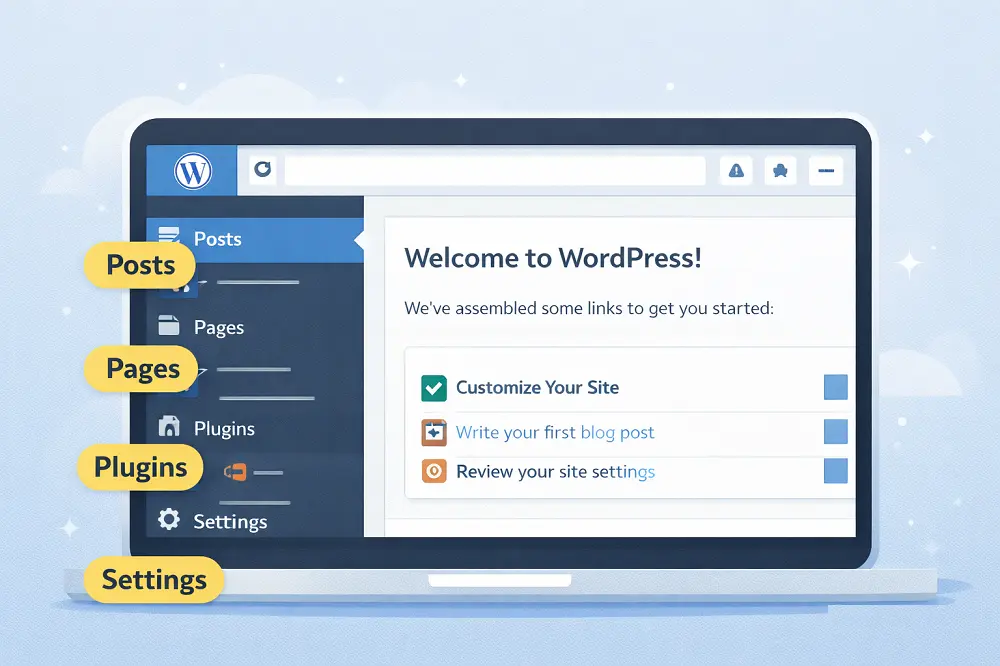
जब आप wp-admin में login करेंगे, तो left side में menu दिखेगा। सबसे ऊपर है “Dashboard” – यह home page है जहां website की पूरी summary दिखती है। “Posts” section से आप blog articles लिखते और manage करते हैं। “Media” में आपकी सारी images और videos हैं। “Pages” में static pages जैसे About Us, Contact बनाते हैं।
“Appearance” section बहुत important है – यहां से आप themes बदलते हैं, menus बनाते हैं और widgets add करते हैं। “Plugins” section से नई functionality add कर सकते हैं। “Users” में team members को access दे सकते हैं। “Settings” में पूरी website की basic settings हैं – जैसे site title, timezone, permalink structure.
Important Settings जो अभी set करनी हैं – Settings > General में जाकर site title और tagline डालें। Settings > Reading में front page display select करें। Settings > Permalinks में “Post name” structure चुनें – यह SEO के लिए best है।
Hindi Language में WordPress use करना भी आसान है। Settings > General में जाएं और Site Language में “हिंदी” select करें। Save changes करें और पूरा dashboard Hindi में हो जाएगा। लेकिन अगर आप comfortable हैं English में, तो English में ही रखें – ज्यादा tutorials और help मिलती है।
अपनी WordPress Blog Website के dashboard को अच्छे से explore करें। हर option पर click करके देखें क्या होता है। Don’t worry – कुछ गलत नहीं होगा और सीखने का यही best तरीका है!
4. WordPress Blog Website Ko Customize Karna

4.1 Best WordPress Themes for Indian Businesses
Theme आपकी WordPress Blog Website का चेहरा है – जैसे दुकान की सजावट। सही theme आपकी website को professional और attractive बनाती है।
Free vs Premium Themes की बात करें तो फ्री themes शुरुआत के लिए बिल्कुल ठीक हैं। WordPress में हजारों free themes हैं जो अच्छी दिखती हैं। लेकिन premium themes (₹2000-5000 में) ज्यादा features देती हैं, better support मिलता है और regular updates आते हैं। अपनी WordPress Blog Website के लिए पहले free theme से शुरू करें, जब business grow हो तो premium में upgrade करें।
Popular Themes जो Indian businesses में बहुत use होती हैं – Astra (सबसे light और fast, free version भी powerful है), GeneratePress (simple और clean design, SEO friendly), OceanWP (ढेर सारे customization options) और Kadence (modern design, beginners के लिए perfect)। ये सभी Hindi content के साथ अच्छी काम करती हैं।
Theme Installation बहुत simple है। WordPress dashboard में Appearance > Themes पर जाएं। “Add New” button दबाएं। Search box में theme का नाम type करें या popular themes browse करें। जो theme पसंद आए, उस पर “Install” button दबाएं, फिर “Activate” करें। बस, आपकी WordPress Blog Website का नया look तैयार!
Theme activate करने के बाद उसे customize जरूर करें। Appearance > Customize में जाएं और colors, fonts, layout अपने brand के according set करें। Live preview देखते हुए changes करें ताकि पता चले कैसा दिख रहा है।
4.2 Essential WordPress Plugins Install Karein
Plugins आपकी WordPress Blog Website में नई ताकत add करते हैं – जैसे mobile में apps। सही plugins आपकी website को powerful बनाते हैं।
SEO Plugins सबसे जरूरी हैं। Yoast SEO या Rank Math install करें – दोनों free हैं और बहुत अच्छे हैं। ये Google पर rank करने में मदद करते हैं। Rank Math थोड़ा ज्यादा features देता है और Indian users में popular है। अपनी WordPress Blog Website के लिए एक ही SEO plugin रखें, दोनों नहीं।
Security Plugins आपकी website को hackers से बचाते हैं। Wordfence Security free में best है – firewall, malware scan, login security सब देता है। Sucuri भी अच्छा है लेकिन paid है। छोटी WordPress Blog Website के लिए Wordfence काफी है।
Caching Plugins website की speed बढ़ाते हैं। WP Rocket सबसे अच्छा है लेकिन paid है (₹4000/year)। Free में W3 Total Cache या WP Super Cache use करें। Caching से आपकी WordPress Blog Website 2-3 गुना fast हो सकती है – बहुत जरूरी है Indian users के लिए जिनका internet slow होता है।
Contact Form Plugins जरूरी हैं customer queries के लिए। Contact Form 7 सबसे popular है और बिल्कुल free। WPForms थोड़ा आसान है और drag-drop से form बना सकते हैं।
Backup Plugins बहुत important हैं। UpdraftPlus free version काफी है – automatic backups ले लेता है और Google Drive पर save कर देता है। आपकी WordPress Blog Website का backup रोज लेना चाहिए, especially जब नए changes कर रहे हों।
Plugin install करने के लिए Plugins > Add New में जाएं, plugin name search करें, Install करें फिर Activate। लेकिन ध्यान रखें – बहुत ज्यादा plugins न डालें (10-15 से ज्यादा नहीं)। हर plugin website को थोड़ा slow करता है।
4.3 Basic Customization Settings
अब अपनी WordPress Blog Website को अपने brand के according customize करते हैं। यह बिल्कुल वैसा है जैसे नई दुकान में सामान सजाना।
Site Title और Tagline सबसे पहली चीज़ है। Settings > General में जाएं और अपनी website का proper title डालें – जैसे “Mumbai Fashion Store – Latest Trendy Clothes”. Tagline में एक छोटी line लिखें जो बताए कि आप क्या करते हैं – “Your Style, Our Passion”। यह Google search results में दिखता है इसलिए attractive रखें।
Permalink Structure बहुत important है SEO के लिए। Settings > Permalinks में जाएं और “Post name” option select करें। इससे आपकी WordPress Blog Website के URLs clean दिखेंगे – जैसे “yoursite.com/how-to-start-blog” instead of “yoursite.com/?p=123″। यह structure user-friendly और SEO-friendly दोनों है।
Menu Creation से visitors को आपकी website navigate करने में आसानी होती है। Appearance > Menus में जाएं। एक नया menu बनाएं – जैसे “Main Menu”. अब जो pages add करने हैं (Home, About, Services, Blog, Contact), वो select करें और “Add to Menu” पर click करें। Drag-drop से order set करें। Save करें और Theme Locations में “Primary Menu” select करें।
Widget Areas sidebar और footer को customize करते हैं। Appearance > Widgets में जाएं। यहां आप search box, recent posts, categories, social media icons जैसे widgets add कर सकते हैं। अपनी WordPress Blog Website के sidebar में जरूरी widgets ही रखें – बहुत ज्यादा widgets se clutter दिखता है।
Colors और fonts भी change करें Appearance > Customize से। अपने brand colors use करें ताकि website consistent दिखे। Font size readable रखें – कम से कम 16px body text के लिए। Indian users अक्सर mobile से पढ़ते हैं इसलिए text clear होना चाहिए।
5. Pehla Blog Post Kaise Likhein
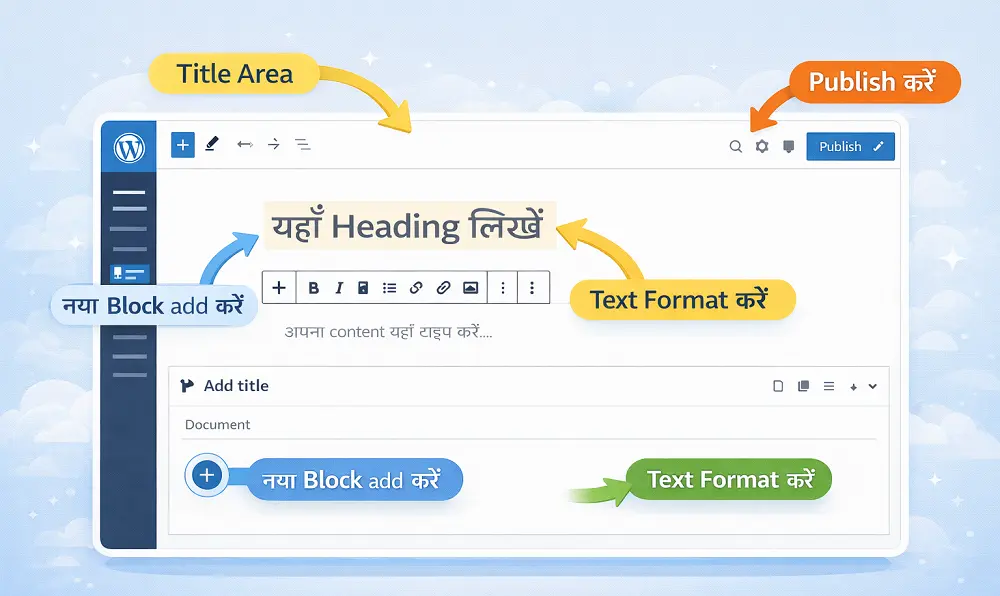
5.1 WordPress Post Editor Ka Use
अब सबसे exciting part आता है – अपनी WordPress Blog Website पर पहला article लिखना! यह बिल्कुल Microsoft Word में लिखने जैसा है, बस कुछ extra features के साथ।
WordPress में दो तरह के editors हैं। Classic Editor पुराना है – simple toolbar के साथ, बिल्कुल Word जैसा। Gutenberg Block Editor नया है और ज्यादा powerful – इसमें हर paragraph या image एक “block” होता है जिसे आप drag-drop से move कर सकते हैं।
Gutenberg use करना आसान है। Posts > Add New पर click करें। Title में catchy heading लिखें – जैसे “Mumbai में Best Street Food कहाँ मिलेगा”। Enter press करें और नीचे content लिखना शुरू करें। Plus (+) icon से नए blocks add करें – paragraph block text के लिए, image block photos के लिए, heading block subheadings के लिए।
Formatting Options बहुत हैं। Text select करके bold, italic, link add कर सकते हैं। Heading blocks से H2, H3, H4 headings बनाएं (H1 automatically title होता है)। List block से bullet points या numbered lists. Quote block से important quotes highlight करें। आपकी WordPress Blog Website professional दिखनी चाहिए इसलिए formatting neat रखें।
Hindi Content लिखने के लिए बस अपने keyboard में Hindi typing enable करें (Google Input Tools best है)। WordPress Hindi text को perfectly support करता है। Devanagari script में लिखा content भी Google search में अच्छा rank करता है। हिंग्लिश भी चलता है अगर आपके readers comfortable हैं उसमें।
5.2 SEO-Friendly Content Writing Tips
अच्छा article लिखना तो जरूरी है, लेकिन अगर Google पर नहीं दिखेगा तो फायदा क्या? SEO-friendly content लिखना सीखिए।
Keyword Research सबसे पहला step है। Google Keyword Planner, Ubersuggest या AnswerThePublic use करें यह जानने के लिए कि Indian audience क्या search कर रही है। मान लीजिए आप fitness blog चला रहे हैं – “weight loss tips in Hindi”, “yoga for beginners”, “diet plan for Indians” जैसे keywords ढूंढें। अपनी WordPress Blog Website के हर article में एक main keyword focus रखें।
Title, Headings और Meta Description बहुत जरूरी हैं। Title में main keyword जरूर रखें – शुरुआत में हो तो best है। 60 characters से ज्यादा लंबा न रखें। Headings (H2, H3) में भी related keywords naturally use करें। Meta description 150-160 characters का लिखें जो article का summary दे – यह Google search results में दिखता है।
Image Optimization भूल जाते हैं लोग लेकिन बहुत important है। Images upload करने से पहले उन्हें compress करें (TinyPNG जैसे tools से) ताकि WordPress Blog Website fast load हो। हर image में “Alt text” add करें जो describe करे कि image में क्या है – “Mumbai street food stalls” न कि “IMG_1234”. यह visually impaired users और Google दोनों के लिए helpful है।
Internal Linking Strategy से आपकी WordPress Blog Website का SEO boost होता है। जब नया article लिखें, तो उसमें अपने पुराने articles के links add करें जहां relevant हो। मान लीजिए “Digital Marketing Tips” article लिख रहे हैं, तो उसमें अपने “Social Media Strategy” article का link दें। इससे visitors ज्यादा time बिताते हैं आपकी website पर।
Content लिखते समय natural रहें। Keywords जबरदस्ती ठूसने की जरूरत नहीं – Google smart है। अच्छी, helpful information दें जो readers के काम आए। बाकी SEO अपने आप होगा।
5.3 Categories Aur Tags Setup
Categories और Tags आपकी WordPress Blog Website को organized रखते हैं – जैसे library में books को sections में रखते हैं।
Categories broad topics होते हैं। मान लीजिए आपकी WordPress Blog Website food के बारे में है, तो categories हो सकते हैं – “Recipes”, “Restaurant Reviews”, “Cooking Tips”, “Street Food”. हर post को एक (या maximum दो) category में रखें। बहुत ज्यादा categories बनाने से confusion होता है – 5-7 categories काफी हैं छोटी website के लिए।
Tags specific topics होते हैं। Same food blog में tags हो सकते हैं – “vegan”, “spicy”, “quick recipes”, “Punjabi food”, “Mumbai restaurants”। Tags से visitors easily related content ढूंढ सकते हैं। एक post में 3-5 tags रखें, ज्यादा नहीं।
Categories बनाने के लिए Posts > Categories में जाएं। Category name, slug (URL-friendly name) और description add करें। Tags सीधे post लिखते समय add कर सकते हैं right sidebar में।
Blog Organization Best Practices – एक clear structure follow करें। हर category के लिए अलग color या icon use कर सकते हैं (theme support करे तो)। Categories को menu में add करें ताकि visitors browse कर सकें। Archive pages को भी customize करें ताकि category pages attractive दिखें।
User Experience improve होता है जब content well-organized हो। Visitors को जो चाहिए वो जल्दी मिल जाता है। Google भी organized websites को prefer करता है। अपनी WordPress Blog Website में categories और tags thoughtfully use करें – randomly नहीं।
6. WordPress Blog Website Ko Professional Banaye

6.1 Important Pages Banaye
Professional WordPress Website में कुछ essential pages होना जरूरी है – यह trust और credibility बढ़ाते हैं।
About Us Page सबसे important है। यहां बताएं कि आप कौन हैं, आपका बिजनेस क्या करता है और visitors को आपसे क्यों connect करना चाहिए। Personal touch दें – अपनी photo add करें, story share करें। मुंबई में boutique चलाते हैं तो बताएं कि कैसे शुरू किया, क्या challenges face किए। लोग stories से connect करते हैं।
Contact Page में multiple options दें। Contact form जरूर रखें (Contact Form 7 plugin से बनाएं)। Indian phone number clearly लिखें (+91 के साथ)। Email address, office address with Google Maps embed और business hours भी mention करें। WhatsApp number दें तो aur bhi achha – Indian customers WhatsApp prefer करते हैं।
Privacy Policy और Terms & Conditions legally जरूरी हैं, especially अगर आप data collect कर रहे हैं या products/services बेच रहे हैं। Free privacy policy generators available हैं online – WordPress plugin भी हैं जैसे WP AutoTerms. Indian laws के according policy बनाएं।
Services/Products Page पर detail में बताएं कि आप क्या offer करते हैं। Photos, pricing (अगर comfortable हैं) और clear call-to-action buttons दें। आपकी WordPress Blog Website visitors को customers में convert करनी चाहिए – यह page उसमें बहुत काम आता है।
Pages बनाने के लिए Pages > Add New में जाएं। Template select करें (Full Width usually best होता है इन pages के लिए)। Professional photos और proper formatting use करें।
6.2 Business Information Add Karein
अपनी WordPress Blog Website को genuine business की तरह present करना जरूरी है – especially Indian market में जहां trust बहुत matter करता है।
GST Details अगर आपका registered business है तो footer में GST number mention करें। यह credibility बढ़ाता है। “GST: 27AXXXX1234X1Z1” format में लिखें। Business registration details भी About page या footer में add कर सकते हैं।
Social Media Links जरूर add करें। Header या footer में Facebook, Instagram, Twitter, LinkedIn icons लगाएं जो आपके social media pages पर link करें। Indian businesses के लिए Facebook और Instagram सबसे important हैं। Icons clickable और visible होने चाहिए।
Email Newsletter Signup Form se आप direct connection बना सकते हैं customers से। Homepage पर या sidebar में email signup form रखें। MailChimp या MailerLite जैसी free email marketing services use करें (2000 subscribers तक free हैं)। Offer दें signup के लिए – “Sign up करें और पाएं 10% discount का coupon!”
WhatsApp Business Integration बहुत powerful है Indian market में। WhatsApp chat widget add करें अपनी WordPress Blog Website पर (free plugins available हैं)। Visitors direct आपसे WhatsApp पर बात कर सकते हैं – inquiries instantly handle हो जाती हैं। “Click to Chat on WhatsApp” button हर product/service page पर रखें।
Footer में सारी business information organized रखें – address, phone, email, GST number, social links. Trust badges भी add कर सकते हैं अगर आप certified हैं किसी organization से।
6.3 Professional Email Setup
yourname@gmail.com की जगह yourname@yourwebsite.com से email भेजना ज्यादा professional लगता है। यह आपकी WordPress Blog Website की credibility काफी बढ़ा देता है।
Custom Domain Email setup करने के दो main तरीके हैं। पहला – अपनी hosting provider से email hosting लें (usually ₹50-100/month per email)। Hostinger, Bluehost सब offer करते हैं। cPanel में email accounts बना सकते हैं easily।
दूसरा तरीका है Gmail से Professional Email Link करना। Google Workspace (पहले G Suite) use करें – ₹125/month per user से शुरू। इसमें Gmail का interface मिलता है लेकिन आपकी company domain के साथ। 30GB storage, video conferencing और Drive storage भी मिलता है। Setup बहुत simple है – domain verify करो, MX records update करो और emails शुरू करो।
Free option भी है – Zoho Mail। 5 users तक free है (1 user को 5GB storage)। आपकी WordPress Blog Website के लिए काफी है अगर budget tight है। Professional features भी मिलते हैं.
Email Signature भी जरूरी है। अपने emails में professional signature add करें – name, designation, company name, WordPress Blog Website URL, phone number, social media links। WiseStamp या HubSpot signature generator use करें attractive signatures बनाने के लिए।
Professional email से client communication, invoices और business correspondence ज्यादा credible लगता है। Customers seriously लेते हैं आपको।
7. WordPress Blog Website Ki Security Aur Performance
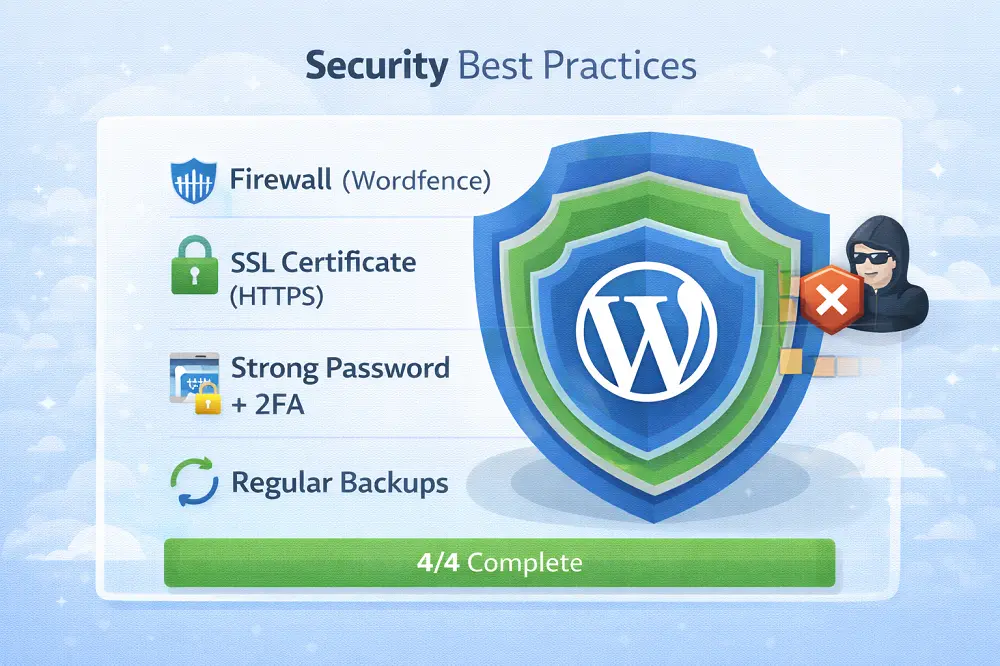
7.1 WordPress Security Best Practices
Security आपकी WordPress Blog Website के लिए उतनी ही जरूरी है जितनी दुकान में ताला। Hackers रोज हजारों websites attack करते हैं – prepared रहना चाहिए।
Strong Passwords सबसे basic लेकिन सबसे important security step है। “admin123” या “password” जैसे passwords कभी न रखें। Minimum 12 characters का password बनाएं with uppercase, lowercase, numbers और special characters – जैसे “Mum@2024Bl0g#Sit3”. Password manager use करें (LastPass, 1Password) ताकि याद रखने की tension न हो।
Two-Factor Authentication (2FA) add करना बहुत जरूरी है। Wordfence Security plugin इसका free option देता है। Login करते समय password के साथ-साथ आपके phone पर code आएगा – double security। Even अगर कोई आपका password crack कर ले, तब भी बिना phone के login नहीं कर सकता।
Regular Backups life-saver होते हैं। UpdraftPlus plugin से automatic daily backups setup करें। Backups Google Drive या Dropbox पर save होने चाहिए – website के server पर नहीं। अगर कभी website hack हो या crash हो, तो एक click में restore कर सकते हैं। सोचिए बिजनेस की सारी मेहनत एक second में गायब – backups इससे बचाते हैं।
SSL Certificate होना compulsory है। यह आपकी WordPress Blog Website को HTTPS बनाता है – जिसका मतलब है data encrypted है। Free SSL certificate मिलता है hosting के साथ (Let’s Encrypt)। Really Simple SSL plugin install करें – automatically सब setup हो जाएगा। Google भी HTTPS websites को prefer करता है ranking में।
Wordfence या Sucuri Security plugin install करें. Regular malware scans, firewall protection और login attempt limiting – सब features मिलते हैं। Security updates जैसे ही available हों, तुरंत install करें।
7.2 Website Speed Optimization
Speed बहुत matter करती है। अगर आपकी WordPress Blog Website 3 seconds से ज्यादा लेती है load होने में, तो 40% visitors छोड़ कर चले जाते हैं। India में internet speed variable है, इसलिए optimization और भी जरूरी है।
Image Compression पहला step है। Images usually website का सबसे heavy part होती हैं। Upload करने से पहले images को compress करें – TinyPNG, ShortPixel या Imagify use करें। 2MB की image को 200KB तक compress कर सकते हैं बिना quality loss के। Smush plugin automatically सारी images compress कर देता है।
Caching Setup website को dramatically fast करता है। Cache मतलब website की एक ready copy save करना ताकि har baar database से load न करना पड़े। WP Super Cache या W3 Total Cache (free) install करें। Settings में “Enable” करें और basic setup complete। Premium चाहिए तो WP Rocket best है (₹4000/year) – सबसे fast results देता है।
CDN Services Indian traffic के लिए helpful हैं। CDN (Content Delivery Network) आपकी website की copy multiple servers पर रखता है worldwide। Cloudflare free CDN offer करता है – setup भी easy है। Indian visitors को Delhi या Mumbai server से content मिलेगा, US visitors को New York server से – result है faster loading everywhere।
Mobile Optimization सबसे important है. Google now mobile-first indexing use करता है। अपनी WordPress Blog Website mobile पर test करें – Google Mobile-Friendly Test tool use करें। Responsive theme use करें, font sizes readable रखें (minimum 16px) और buttons touch-friendly बनाएं।
GTmetrix या Google PageSpeed Insights से regular अपनी WordPress Blog Website की speed check करें. 90+ score aim करें. Slow website = lost customers = lost money.
8. WordPress Blog Ko Google Par Rank Kaise Karaye
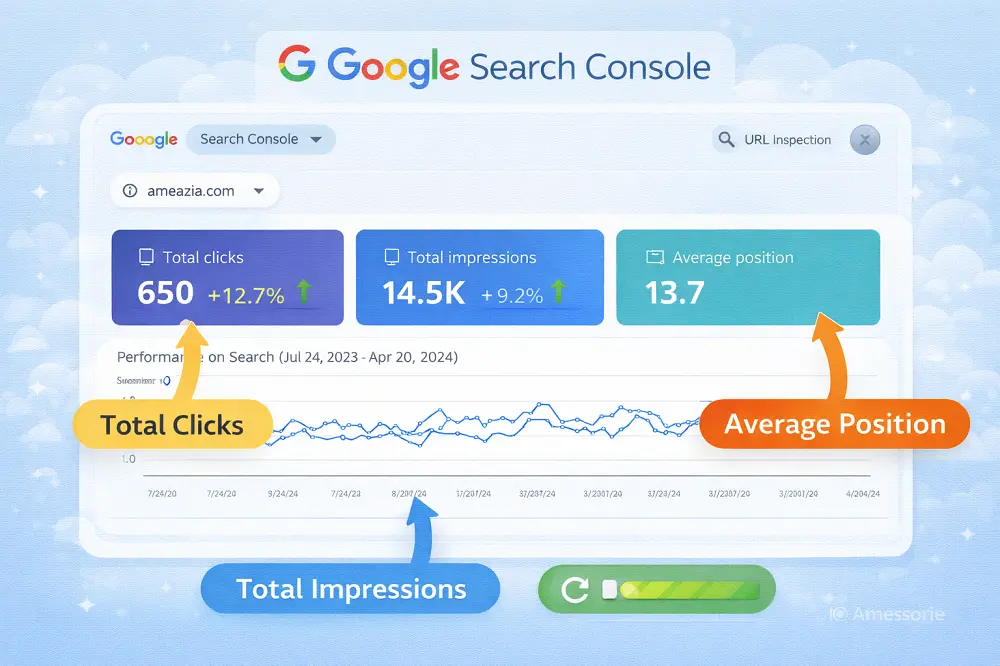
8.1 Google Search Console Setup
Google Search Console (GSC) free tool है जो बताता है कि Google आपकी WordPress Blog Website को कैसे देख रहा है। यह सेटअप करना बहुत जरूरी है।
Site Verification Process simple है। Google Search Console पर जाएं (search.google.com/search-console) और “Add Property” click करें। अपनी website URL डालें। Verification के कई methods हैं – सबसे आसान है HTML tag method. GSC एक meta tag देगा, उसे अपनी website के header में paste करें (Yoast SEO plugin से easily कर सकते हैं)। “Verify” दबाएं और done!
Sitemap Submission next step है। Sitemap एक file है जो Google को बताती है कि आपकी WordPress Blog Website पर कौन-कौन से pages हैं। Yoast SEO या Rank Math plugin automatically sitemap बना देते हैं – yoursite.com/sitemap.xml पर available होगा। GSC में “Sitemaps” section में जाकर यह URL submit करें।
Index Coverage Monitoring से पता चलता है कि कितने pages Google ने index किए हैं। GSC dashboard में “Coverage” report check करें। अगर errors हैं (pages indexed नहीं हुए) तो fix करें। Regular check करते रहें – new articles publish करने के बाद especially.
GSC में “Performance” report बहुत valuable है। देख सकते हैं कि लोग कौन से keywords search करके आपकी WordPress Blog Website पर आ रहे हैं, कितने clicks मिल रहे हैं, average position क्या है। इस data से समझ आता है कि क्या content काम कर रहा है और क्या नहीं।
8.2 Basic SEO Settings
SEO का मतलब है Search Engine Optimization – basically Google को समझाना कि आपकी WordPress Blog Website best result है user की query के लिए।
On-page SEO Checklist follow करें हर article के लिए। Title में main keyword, first paragraph में keyword mention, headings में related keywords naturally, images में alt text, meta description compelling, internal links add करें। Yoast SEO plugin traffic light system देता है – green light aim करें।
Keyword Optimization Hindi और English दोनों के लिए करें। Indian audience अक्सर Hinglish search करती है – “best laptop under 50000”, “Mumbai mein Italian restaurant”. Both languages में keywords research करें. Google Keyword Planner India-specific data देता है।
Local SEO Indian cities के lिए बहुत powerful है। अगर आप Delhi में CA हैं, तो “CA in Delhi”, “Tax consultant Delhi”, “GST filing services Delhi” जैसे local keywords target करें। अपनी WordPress Blog Website में city name, landmarks mention करें naturally.
Google My Business Integration जरूर करें अगर physical business है। Free listing है। GMB profile बनाएं, complete information भरें, photos add करें, reviews मांगें customers से। GMB profile आपकी website से link करें। जब कोई “restaurants near me” search करेगा, आपकी listing show होगी।
Schema markup add करें (Rank Math plugin automatically करता है) – यह Google को structured data देता है। Rich snippets मिल सकते हैं search results में – star ratings, pricing, availability – जो click-through rate बढ़ाते हैं।
8.3 Content Marketing Strategy
अच्छी WordPress Blog Website बना ली, अब उस पर traffic कैसे लाएं? Content marketing is the answer.
Regular Posting Schedule maintain करना crucial है। Consistency Google को signal देती है कि website active है। Start small – हफ्ते में 2 articles से शुरू करें। Quality ज्यादा important है quantity से। 10 average articles से better है 2 outstanding articles.
Content Calendar बनाएं अगले 3 months के लिए। Excel sheet में plan करें – कौन सा topic कब publish करना है, किस keyword को target करना है, किस category में जाएगा। Festivals और events को consider करें – Diwali से पहले gift guides, January में New Year resolutions, tax season में finance tips.
Social Media Sharing बहुत जरूरी है Indian audience के लिए। हर article Facebook, Instagram, Twitter, LinkedIn पर share करें। Facebook Groups में active रहें जो आपके niche से related हैं। Instagram Stories में article highlights दें। लेकिन sirf links mat phenco – value add करें, discussion start करें।
Email Marketing Basics se loyal audience build होती है। Newsletter भेजें weekly या bi-weekly। New article notifications, exclusive tips, special offers – subscribers को valuable content दें। MailChimp free है 2000 subscribers तक। Subscriber list आपकी सबसे valuable asset है – direct communication channel है।
Guest posting करें दूसरी websites पर – backlinks मिलेंगे जो SEO boost करते हैं। Collaborate करें दूसरे bloggers के साथ। YouTube videos बनाएं articles पर based – multi-channel approach काम करता है।
Remember – content marketing marathon है, sprint नहीं। Patience रखें, consistently काम करें, results आएंगे।
9. Blog Website Se Paise Kaise Kamaye
9.1 Monetization Options for Indian Bloggers
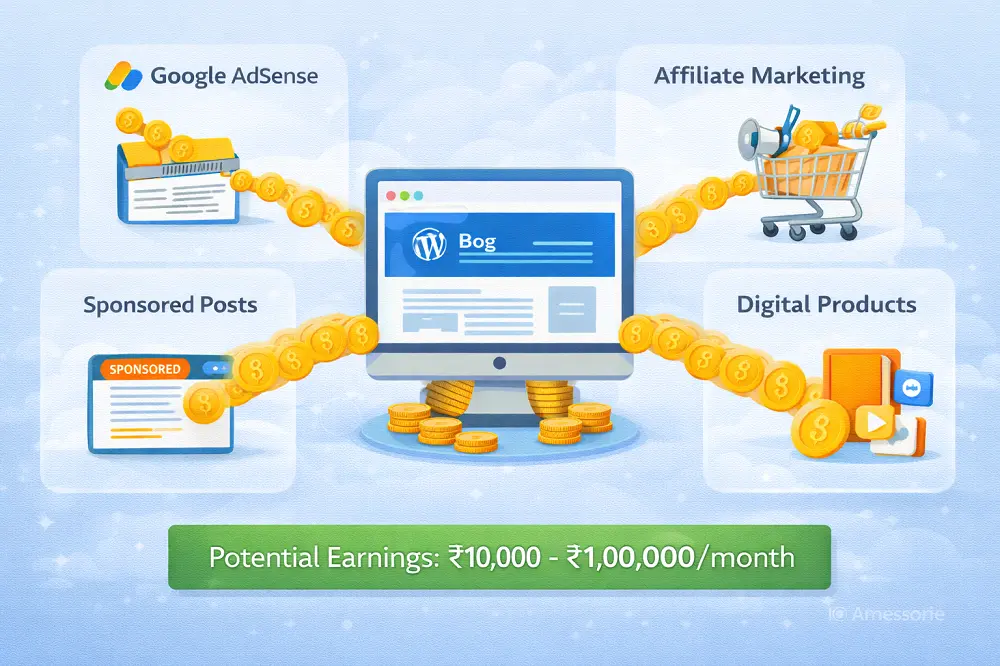
अब सबसे interesting part – आपकी WordPress Blog Website से earning! कई तरीके हैं पैसे कमाने के।
Google AdSense सबसे popular है। आपकी website पर Google ads show होते हैं, visitors click करते हैं, आपको पैसे मिलते हैं। AdSense approval के लिए quality content चाहिए (minimum 20-30 original articles), good traffic (500-1000 daily visitors helpful) और compliant website (no copied content, adult material). Apply करें adsense.google.com पर। Approval में 2-4 weeks लग सकते हैं। Indian bloggers को earnings INR में मिलती हैं directly bank account में।
Affiliate Marketing बहुत profitable है। Amazon Associates India सबसे easy है start करने के लिए – products recommend करो, अगर कोई आपके link से खरीदे तो 1-10% commission मिलता है। Flipkart Affiliate program भी है। Tech products, books, electronics में अच्छा commission मिलता है। अपनी WordPress Blog Website पर honest reviews लिखें products के, affiliate links add करें। Disclosure जरूर दें – “यह एक affiliate link है” – transparency builds trust.
Sponsored Posts directly brands से deal करके कमा सकते हैं। जब आपकी WordPress Blog Website famous हो जाए (10,000+ monthly visitors), brands approach करेंगे sponsored content के लिए। ₹5,000 से ₹50,000 तक charge कर सकते हैं per post, depending on reach. But authentic रहें – sirf उन्हीं products को promote करें जिनमें believe करते हैं।
Digital Products बेचना सबसे profitable है. Ebooks, online courses, templates, photography – कुछ भी digital बना के बेच सकते हैं। Example – fitness blog चलाते हैं तो “30-Day Home Workout Plan” ebook बेचें ₹299 में। WooCommerce या Easy Digital Downloads plugin use करें।
Services Selling आपकी expertise based services offer कर सकते हैं। Freelance writing, consulting, coaching – आपकी WordPress Blog Website आपका portfolio है। “Hire Me” page बनाएं, rates mention करें।
9.2 Payment Methods for Indian Bloggers
Paisa kamaya, ab receive kaise karein? Indian bloggers के लिए कई payment options हैं।
PayPal internationally सबसे common है लेकिन India में limitations हैं – receive कर सकते हैं पर hold नहीं कर सकते without US bank account. Payments आते हैं तो immediately Indian bank में transfer करने पड़ते हैं। Fees भी ज्यादा हैं (4-5%).
Payoneer better option है Indian freelancers और bloggers के लिए। US payment account मिलता है, international payments easily receive कर सकते हैं। INR में withdraw कर सकते हैं Indian bank में। Minimum withdrawal ₹1000, Fees reasonable हैं।
Indian Bank Account directly भी payments receive कर सकते हैं – NEFT/IMPS/UPI से। Indian brands और affiliate programs directly bank transfer करते हैं। सबसे आसान और free है।
Tax Implications important हैं। Blogging income taxable है। अगर सालाना ₹20 लाख से ज्यादा कमाते हैं तो GST registration compulsory है। Income Tax Return जरूर file करें – blogging को “Business & Profession” income show करें। CA से consult करें proper tax planning के लिए।
Conclusion
तो दोस्तों, अब आप जान गए हैं कि कैसे अपनी WordPress Blog Website बनाएं – domain खरीदने से लेकर पैसे कमाने तक! यह journey आसान लगती है पढ़ने में, लेकिन असली मज़ा तो करने में है।
WordPress Blog Website बनाना सिर्फ शुरुआत है। असली चुनौती है consistency बनाए रखना। हर हफ्ते quality content publish करना, अपने readers से जुड़ना, नई चीज़ें सीखना – यह सब patience मांगता है। कई bloggers 3-4 महीने में हार मान लेते हैं क्योंकि तुरंत results नहीं दिखते। लेकिन जो लोग 1-2 साल consistently काम करते हैं, वे अच्छी income generate करते हैं अपनी WordPress Blog Website से।
Next Steps: आज ही शुरू करें। एक domain name सोचें, hosting plan choose करें और WordPress install करें। पहला article लिख डालें – भले ही perfect न हो। सबसे बड़ी mistake है शुरू ही न करना।
Frequently Asked Questions
1. WordPress Blog Website बनाने में कितना खर्चा आता है? | How much does it cost to create a WordPress blog website?
Domain के लिए ₹500-1000/year, hosting के लिए ₹2000-5000/year – total ₹3000-6000 सालाना में professional WordPress Blog Website शुरू कर सकते हैं। Premium themes और plugins optional हैं।
2. क्या WordPress Blog Website बनाने के लिए coding आनी जरूरी है? | Do I need coding skills to create a WordPress blog website?
बिल्कुल नहीं! WordPress specially non-technical लोगों के लिए बनाया गया है। Drag-drop interface है, ready themes हैं, plugins से functionality add होती है – कोई coding नहीं चाहिए।
3. WordPress Blog Website से पैसे कमाने में कितना समय लगता है? | How long does it take to earn money from a WordPress blog website?
Generally 6-12 महीने consistency से काम करने के बाद decent income शुरू होती है। पहले 3-4 महीने building phase होता है – content create करना, SEO करना, audience build करना। Patience बहुत जरूरी है।
4. Free WordPress.com और Paid WordPress.org में क्या अंतर है? | What’s the difference between free WordPress.com and paid WordPress.org?
WordPress.com free है लेकिन limited features हैं – custom domain नहीं, monetization नहीं, plugins नहीं। WordPress.org self-hosted है – आपको hosting खरीदनी पड़ती है लेकिन complete control मिलता है और सारे features available हैं।
5. WordPress Blog Website का maintenance कैसे करें? | How to maintain a WordPress blog website?
Regular backups लें (weekly), updates install करें (WordPress, themes, plugins), security check करें, speed optimize करें, broken links fix करें। Monthly 2-3 घंटे maintenance में लगाएं। UpdraftPlus और Wordfence जैसे plugins काम आसान कर देते हैं।
Start Your WordPress Blog Website with Ameazia
WordPress Blog Website बनाना exciting है, लेकिन कभी-कभी questions या technical problems आ सकती हैं। Don’t worry – Ameazia यहाँ है आपकी मदद के लिए!
चाहे आपको WordPress Blog Website setup में help चाहिए, theme customization में problem हो, SEO optimize करना हो या कोई भी technical issue solve करनी हो – Ameazia की expert team आपकी पूरी मदद करेगी। हम Indian businesses को digital success दिलाने में specialized हैं।
Ameazia’s Services:
- Complete WordPress Blog Website Setup & Design
- Premium Theme Customization
- Search Engine Optimization
- Security & Speed Optimization
- Content Strategy & Marketing
- Ongoing Maintenance & Support
आज ही Ameazia से contact करें और अपनी WordPress Blog Website को professional, secure & profitable बनाएं। आपका success हमारा mission है!
📧 Contact Ameazia today – क्योंकि आपकी WordPress Blog Website deserve करती है best support!